|
Build Your Own Buttboard
Almost every purpose built Buttboard is derivative of the original Lott Classic. It's popular for two reasons. First, the design performs exceptionally well. Second, it delivers an elegance which is easily copied.
Buttboards are limited to 12" wide and 48" long, enabling you to take a 4'x8' sheet of plywood and create eight decks. When you make multiple boards at the same time it's more efficient, and easier to enlist help. Don't worry that the finished boards will end up slightly smaller than the max (due to saw cuts, routering and sanding).
Step one is to pick out a nice piece of wood. 11 to 13 ply Baltic Birch is ideal. Thickness should be between 16 to 19 mm (Baltic will probably be in metric, otherwise 5/8" to 3/4" thickness).
(You can even make a functioning deck from 7 ply 3/4" cabinet grade plywood. It won't be as strong or long lasting, but since your weight is distributed over both trucks, it won't break as quickly as a board ridden standing up. You can also beef up an inferior deck by gluing a thin wooden stringer underneath. Make sure it runs the full length under both trucks.)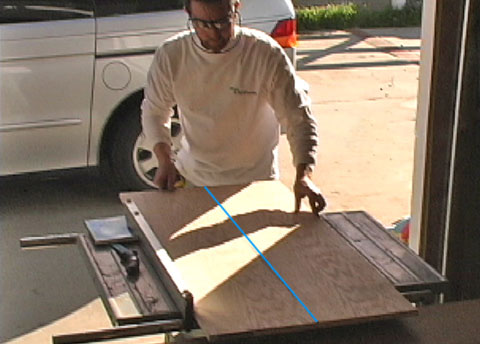
Step two is to cut out a 12" x 48" rectangle. You will want to mark all your measurements while you still have square edges.
So Step three is to pencil in a center line running the length of the board.
The rest of the measurements are made with the tail as the reference point. There are 3 critical reference points that comprise the Lott Classic design: The placement of the back truck, the front truck, and the leading edge of the grip rail. When you ride a Lott Classic, your index fingers will grip the deck butted up to the leading edge of the grip rail, like a trigger. When you straighten your arms and lie back, your body weight will be properly distributed over both trucks. That's the magic! It's a formula that works for pretty much any body size. And it's key to high speed stability despite the minimal wheelbase.
With the diagram on the right, you can pretty much figure out the rest. But let's continue to step through with a bit of construction advice:
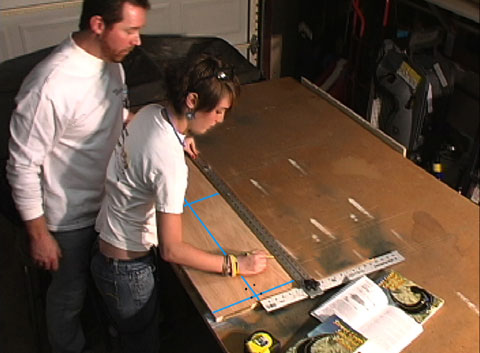
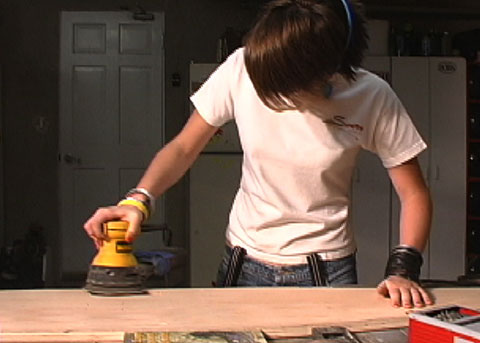
John Cazin assists daughter Eastyn with making her own Buttboard.
Step four is to add perpendicular lines across the center line using the measurements from the diagram.
1" up from the tail is the back holes for the back truck.
15" up from the tail is about where you want a rearward grip rail. You can also make one long continuous front grip rail instead of two pieces.
24"
up from the tail is the midpoint, where you begin the tapering lines.
31" up from the tail is where the front edge of the front grip rails.
36" up from the tail is where the front holes for the front truck.
Step 5 is to pencil some arcs at the front and rear, and use a ruler to draw in the tapering lines. The tapering lines start 12" wide at the midpoint of the board and end 5" wide at the rear holes. The front arc isn't hypercritical. Some variants of the Lott Classic design, like the Wizard or Forkdog, don't use a rounded nose. If you crash into something while braking, the board will ram into the back of your legs. You want a rounded nose to minimize injury to yourself or others.
Step 6 is to mark the hole placement for your trucks. Instead of trying to figure out where each hole should be based on any other measurements, take the base plates of the actual trucks you are going to use and line them up on the center line. Position one set of holes over the perpendicular you've drawn and then mark the exact position of all 4 holes. Repeat for the other truck.
Step 7 is to drill the holes for your trucks. You may be tempted to wait until you've finished a your really nice deck, and then drill the holes last. But the holes are easy to screw up. If you have to scrap the wood, it's better to know before you've put a lot more work into it. It's pretty easy to drill straight holes with a drill press, but the front of you deck won't fit into any but the largest of drill presses. You can get an inexpensive attachment for a standard electric drill to make drilling straight holes easier. If you have to improvise, have a friend check your alignment from two vantage points, 90 degrees apart, as you drill. Building Buttboards is a great buddy system project!
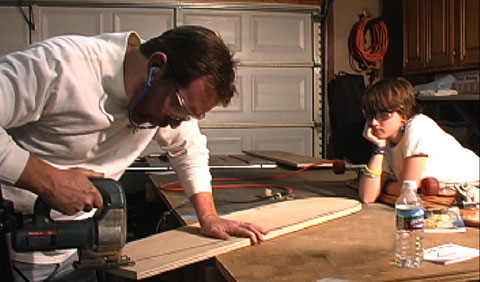
Step 8 is to cut the outlines of the deck. A jig saw or large band saw is ideal. If you don't have, or aren't trained with using power tools, cut the straight lines with a hand saw and cut the curves with a coping saw. Buttboards have been made using only hand tools, in the pits, on race day!
Step 9 is to sand the edges smooth (but don't erase the lines for your grip rail placement.) Routers are ideal to produce evenly rounded edges. Power sanders facilitate more artistic curves. But you could do it all with a file and sandpaper.
Step 10 is to glue on a stringer if you need one, and attach the grip rails. You can make the grip rails from wood or plastic. If you buy vintage skateboard rails like the "Big Ugly" sets, they are 14.5" long. Cut them in half at 6" and use the shorter piece in front. Install them with the tapered end to the rear of the deck. If you fabricate your own out of 1/2" high density plastic, make them about 24" long (one for each side) and place screw holes about every 4". They should be about 3/4" wide.
That's about it!
You can sand more, stain, or primer & paint. It's good to do something to seal the wood against water or dirt. If you add a nice glossy finish you probably need to add some grip tape, pads or something else to keep from sliding around too much.
If you have questions about which trucks or wheels to use, read the FAQ's.
If you haven't read the "Ride Safely" section yet, do so before testing your new creation.
Have Fun!
|